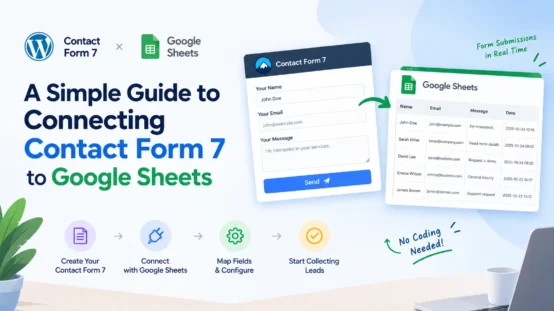
A Simple Guide to Connecting Contact Form 7 to Google Sheets
Contact forms make it easy for visitors to contact a business, request a quote, ask questions, or subscribe to updates. However, managing all those submissions through email alone can become difficult as a website grows.
If you use Contact Form 7 on WordPress, you can connect it to Google Sheets to organize form submissions in a spreadsheet automatically. Instead of copying names, email addresses, and messages from your inbox, you can keep the information in one searchable, shareable place.
In this guide, you will learn how to connect Contact Form 7 to Google Sheets, configure the integration, test your setup, and troubleshoot common problems. You do not need advanced coding skills to get started.
Why Connect Contact Form 7 to Google Sheets?
Contact Form 7 is a popular WordPress plugin for creating contact forms. It handles form submissions and email notifications, but it does not automatically send submissions to Google Sheets without an additional integration.
Connecting your form to a spreadsheet can make everyday tasks easier.
- Organize leads: Keep inquiries, customer questions, and quote requests in a structured spreadsheet.
- Reduce manual work: Avoid copying information from individual email notifications.
- Improve team collaboration: Share a spreadsheet with authorized team members who need to follow up on inquiries.
- Find information faster: Sort and filter submissions by name, date, email address, or inquiry type.
- Track business activity: Review incoming requests and identify patterns over time.
For example, a small web design agency could use a Google Sheet to track potential clients who submit a project inquiry form. The team can review each request, assign follow-up tasks, and update the status as the lead progresses.
Google Sheets is useful for organizing this information, although it should not replace a secure customer relationship management system when advanced access controls or workflows are required.
What You Need Before Getting Started
Before connecting Contact Form 7 to Google Sheets, make sure you have the following:
- A WordPress website with administrator access.
- Contact Form 7 installed and activated.
- A Google account with permission to create or edit spreadsheets.
- A Google Sheet where form submissions will be collected.
- A compatible Google Sheets connector plugin.
If Contact Form 7 is not installed yet, follow the official Contact Form 7 documentation for setup instructions.
For this tutorial, we will use a connector plugin to link the form with Google Sheets. One option is GSheetConnector for Contact Form 7, which provides an integration between WordPress forms and Google spreadsheets.
Step 1: Create a Google Sheet
Start by creating a spreadsheet to store your form submissions.
- Open Google Sheets.
- Create a new blank spreadsheet.
- Give it a descriptive name, such as Website Contact Form Leads.
- Rename the first worksheet tab to something recognizable, such as
Contact Leads. - Add column headings in the first row.
For example, your spreadsheet might use these headings:
| Name | Subject | Message | Submission Date | |
|---|---|---|---|---|
| Example User | user@example.com | Website inquiry | Request for a quote | 2026-10-28 |
This is only sample data. Your actual columns should reflect the fields in your Contact Form 7 form and the information your team needs.
Using clear headings makes the spreadsheet easier to read, filter, and maintain. Depending on the connector you choose, you may need to match the headings to your form’s field names.
Step 2: Install a Google Sheets Connector Plugin
Contact Form 7 does not provide a built-in Google Sheets connection. You need a compatible integration plugin to send submitted data to a spreadsheet.
To install one:
- Log in to your WordPress dashboard.
- Navigate to Plugins → Add New Plugin.
- Search for a Contact Form 7 Google Sheets integration.
- Review the plugin’s features, compatibility, update history, and support information.
- Click Install Now, then Activate.
You can find the GSheetConnector plugin on WordPress.org.
Before installing a connector, check that it supports your current WordPress and Contact Form 7 versions. Also review whether its free version includes the authentication and spreadsheet features you need.
Step 3: Connect Your Google Account
After activating the connector, open its settings in your WordPress dashboard.
The exact menu names depend on the plugin, but the process generally involves connecting your Google account and granting the requested permissions.
With GSheetConnector, you can begin by opening its Google Sheets integration settings and following the available authentication instructions.
- Select the Google account you want to use.
- Review the permissions requested by the integration.
- Approve the permissions if you are comfortable with them.
- Return to WordPress and confirm that the connection is successful.
Use an account that has the necessary access to the target spreadsheet. If you manage a business website, consider using an account controlled by the organization rather than an employee’s personal account.
Security tip: Grant only the permissions required for the integration. Do not share your Google password or OAuth credentials with other people. For more information about Google’s authorization system, see the Google OAuth documentation.
Some integrations also support manual authentication using Google Cloud credentials. This method involves additional configuration and is generally more suitable for users who need control over their own API setup.
Step 4: Connect Contact Form 7 to Your Spreadsheet
Once your Google account is connected, configure the specific Contact Form 7 form you want to synchronize.
- In WordPress, open Contact → Contact Forms.
- Select the form you want to connect.
- Open the Google Sheets settings or feed section provided by your connector.
- Select the destination spreadsheet, or enter its spreadsheet details if the plugin requires them.
- Select the correct worksheet tab.
- Match the form fields with the corresponding spreadsheet columns.
- Save the configuration.
For example, a Contact Form 7 form might contain these fields:
your-nameyour-emailyour-subjectyour-message
Your spreadsheet should have corresponding columns for the information you want to collect. Some connectors require you to enter the field names as column headers, while others provide field-mapping controls.
Follow the instructions for your chosen plugin rather than assuming that every connector uses the same configuration method.
If you are using GSheetConnector, its Contact Form 7 integration guide provides additional setup information.
Step 5: Submit a Test Entry
Do not assume the integration is working simply because the settings have been saved. Test it before relying on it for customer inquiries.
Open the page containing your contact form and submit a test using information you control.
Then check the following:
- Does Contact Form 7 display its normal success message?
- Does the form’s email notification arrive, if email notifications are enabled?
- Does a new row appear in the correct Google Sheet?
- Are names, email addresses, and messages in the correct columns?
- Are special fields and submission dates handled as expected?
If everything works, the basic integration is ready. New successful submissions should be sent to the spreadsheet according to the connector’s configuration and operation.
If the data does not appear, check the troubleshooting section below before using the form for important business inquiries.
Common Problems and How to Fix Them
Even a straightforward integration can encounter configuration or permission problems. Here are a few things to check.
1. Form submissions are not appearing in Google Sheets
First, confirm that the Google account is connected and that the integration is enabled for the correct form.
Next, verify the spreadsheet details, worksheet tab, and field mapping. A wrong destination or mismatched field configuration can prevent the data from appearing where you expect.
Submit another test entry after making changes.
2. Google authentication fails
If the connection stops working, open the connector’s integration settings and check its authentication status.
You may need to reconnect your Google account or review the credentials and redirect URI if you use manual OAuth authentication. Also check whether the required Google API is enabled in your Google Cloud project.
Refer to Google’s Sheets API documentation if you need to understand the API requirements.
3. The spreadsheet columns do not match the form fields
Check the form’s field names and compare them with the spreadsheet headers. If your connector uses manual mapping, confirm that each field is assigned to the intended column.
Avoid changing field names or column headings without reviewing the connector’s mapping requirements.
4. Some submissions are missing
Start by confirming that the form itself is submitting successfully. Then check the connector’s error logs, authentication status, and API quota or permission errors, where available.
If the form collects important business inquiries, consider maintaining a separate submission backup. For example, you could use an appropriate WordPress database extension that stores entries locally, provided it is compatible with your setup.
Do not assume that a Google Sheets integration automatically provides a complete backup of every submission.
5. The form works, but email notifications stop arriving
Google Sheets synchronization and email delivery are separate processes. A submission appearing in your spreadsheet does not prove that your WordPress email notifications are configured correctly.
Check the mail settings in Contact Form 7 and review your site’s email delivery configuration. The official Contact Form 7 documentation is a useful starting point.
Best Practices for Managing Form Data
Once your integration is working, a few simple habits can help you maintain it.
Keep your spreadsheet organized. Use clear column headings, consistent data formats, and filters to make submissions easier to review.
Limit access to sensitive information. Share the spreadsheet only with people who need it. Avoid using public sharing settings for customer contact details.
Collect only necessary information. Do not request sensitive personal details unless they are genuinely required for your business process. Make sure your form and data-handling practices comply with applicable privacy requirements.
Test after major updates. After updating WordPress, Contact Form 7, or the connector plugin, submit a test entry to confirm that the integration still works.
Monitor important submissions. If missing a lead would affect your business, use an appropriate backup or monitoring process instead of relying on a single integration.
Document your setup. Record which form connects to which spreadsheet, who manages access, and how to reconnect the account if authentication expires.
Frequently Asked Questions
Can Contact Form 7 connect to Google Sheets without a plugin?
Contact Form 7 does not send submissions to Google Sheets by itself. You generally need a compatible integration plugin or a custom solution using the Google Sheets API.
Is it possible to send Contact Form 7 submissions to Google Sheets automatically?
Yes. Once you configure a compatible connector and authorize access to the spreadsheet, new submissions can be synchronized automatically without manually copying data from emails.
Do I need coding skills to connect Contact Form 7 to Google Sheets?
Not usually. A connector plugin with a guided authentication process can handle the integration without requiring you to write code. A custom API implementation, on the other hand, requires more technical work.
Can I connect multiple contact forms to different spreadsheets?
Yes, depending on the connector. Some plugins support a separate spreadsheet configuration for each form, while the number of feeds or advanced mapping options may vary by version.
Is Google Sheets a secure place to store contact form submissions?
Google Sheets provides sharing and access controls, but security also depends on how you configure permissions, which information you collect, and how you manage your Google account. Restrict access to authorized users and avoid storing unnecessary sensitive information.
What should I do if Google Sheets stops receiving submissions?
Check the form, account authorization, spreadsheet and worksheet details, field mapping, plugin logs, and API errors. Submit a new test entry after correcting the problem. If the data is business-critical, maintain an appropriate backup of submissions.
Final Thoughts
Connecting Contact Form 7 to Google Sheets is a practical way to organize website inquiries and reduce manual data entry. With a compatible connector, you can send form submissions to a spreadsheet, make information easier to search, and give authorized team members a shared place to review incoming leads.
Start with a simple spreadsheet, connect your Google account, configure your form fields, and test the entire process. Then review access permissions and backup options so your workflow remains dependable as your website grows.
The most important step is to verify that submissions are reaching the correct spreadsheet before relying on the integration for real customer inquiries.