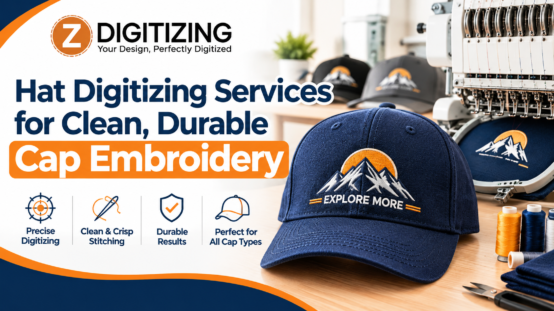
Hat Digitizing Services for Clean, Durable Cap Embroidery
Hat embroidery succeeds or fails in the digitized file long before the cap reaches the machine. If you want logos that sit straight, stitch cleanly, and hold up on curved crowns, you need custom hat digitizing services that build the file around the cap, not around a flat garment.
At ZDigitizing, we convert your artwork into machine-ready embroidery files designed for caps, including structured and unstructured hats. This guide explains how digitizing services work, what we need from you, and which decisions matter most before production starts.
What Are Hat Digitizing Services?
Hat digitizing services convert a logo or image into an embroidery file that tells a machine where to place each stitch, in what direction, and in what order. The result is a stitch file, not a picture. The embroidery machine reads it as a set of instructions.
For caps, the file must account for the curved crown, the seams, the bill, and the stiff front panel. A file built for a flat polo will often distort when stitched on a cap, so cap-specific digitizing is its own discipline.
Why Hats Need Different Digitizing Than Flat Garments
A cap is hooped differently, sits on a curved surface, and has a center seam that can interrupt stitching. These traits change how we build the file.
- Curved surface: Stitches near the edges of a design can shift, so we plan stitch direction and compensation with the curve in mind.
- Center seam: Seams create a raised ridge. We adjust underlay and stitch placement so details do not fall unevenly across it.
- Stiff or structured fronts: Firm buckram supports dense stitching better than soft fabric, but it can also punish excessive density.
- Limited height: Most cap designs sit in a small area, so fine lettering and thin lines need careful sizing.
These factors are why cap work calls for custom hat digitizing services instead of a generic auto-converted file.
How Do Hat Digitizing Services Work?
The workflow is straightforward. Here is how we handle a typical cap project:
- Review the artwork. We check the logo for clarity, color count, and small details that may not stitch well at cap size.
- Set the design size and placement. We size the design for the front panel, side, or back of the cap.
- Choose stitch types. We assign fill stitches, satin stitches, or running stitches to different elements.
- Add underlay and compensation. Underlay stabilizes the fabric, and compensation offsets the pull that thread creates.
- Plan the stitch sequence. We order the design to reduce jumps, trims, and fabric shifting.
- Test and refine. We check the file for issues before it goes to you in your required machine format.
What You Should Send Us
Better source material leads to a better file. When you request cap digitizing, provide:
- Your logo in the highest-quality version you have, such as a vector file or a high-resolution image
- The cap style and fabric, such as structured twill, trucker mesh, or a knit beanie
- Your target design size and placement
- Thread color requirements, if you have them
- Your machine’s required file format
If you only have a low-resolution image, we can still work from it, but we may need to rebuild details. Our Vector Art Service can help clean up weak artwork before digitizing.
Which Embroidery File Formats Do Hats Need?
Different machines read different formats. Common embroidery file types include:
- DST: Widely used on commercial machines, especially Tajima
- PES: Used by Brother and Babylock machines
- EXP: Used by Melco machines
- JEF: Used by Janome machines
Your machine’s format should be confirmed before the file is finalized. Sending the wrong format can delay production, so we recommend stating it up front.
Design Elements That Work Well on Caps
Not every detail suits a small curved surface. These guidelines help your logo stitch cleanly.
Lettering
Very small text can fill in or look muddy. Bold, simple fonts hold up better on caps, and slightly larger lettering improves readability. If your logo has thin text, we can recommend adjustments that preserve the look without sacrificing quality.
Fills and Satin Stitches
Fill stitches cover larger areas, while satin stitches suit borders and narrow elements. Choosing the right stitch type for each part of the design affects both appearance and durability.
3D Puff and Appliqué on Hats
Some cap designs call for raised or layered effects. Our 3D Puff Embroidery Digitizing creates a raised look that is popular on caps, and our Applique digitizing service handles fabric-layered designs. Each technique needs its own file setup, so we prepare them differently from standard flat embroidery.
Common Mistakes in Cap Digitizing
These problems appear often when files are not built for headwear:
- Using a flat-garment file on a cap. The design may distort or pucker on the curve.
- Overly dense stitching. Too many stitches can make the front panel stiff, cause thread breaks, or leave a crater-like surface.
- Tiny details. Fine lines and microscopic lettering rarely survive embroidery at cap scale.
- Ignoring the center seam. A design that crosses the seam without adjustment can look uneven.
- Skipping underlay. Without proper underlay, stitches can sink into the fabric or lose their shape.
Catching these issues before production saves garments, thread, and machine time.
When Professional Digitizing Is Worth It
Auto-digitizing software can convert simple shapes, but it struggles with complex logos, small text, and layered effects. Professional digitizing is especially useful when:
- You are producing a batch of caps and want consistent results
- Your logo contains fine text or multiple colors
- You need a puff, appliqué, or patch-style effect
- A previous file produced puckering, gaps, or thread breaks
If you also work with other headwear styles, our Cap Logo Digitizing and Logo Digitizing services cover related needs.
Start Your Cap Project With Cleaner Files
A well-built stitch file helps your caps look sharp, run smoothly, and hold their shape. If you are ready to turn your logo into a production-ready file, we at ZDigitizing can prepare it for your cap style, fabric, and machine. Send us your artwork and tell us how you plan to use it, and we will help you move forward with confidence.
Frequently Asked Questions
What do hat digitizing services include?
Hat digitizing services convert your logo into a stitch file made for cap embroidery. We set stitch types, density, underlay, direction, and sequence for the curved crown and seam, then provide the file in the format your machine needs.
How is cap digitizing different from regular embroidery digitizing?
Cap digitizing accounts for the curved surface, stiff front panel, and center seam. We adjust stitch direction, compensation, and underlay so the logo stays centered and clean. A flat-garment file often distorts on a hat.
What file should I send for custom hat digitizing?
A vector file is ideal, but a clear, high-resolution image also works. Include the cap style, design size, placement, and your machine’s file format. If your artwork is low quality, we can help rebuild it before digitizing.
Which embroidery formats do you provide for hats?
We can prepare files in common formats such as DST, PES, EXP, and JEF. Tell us which machine you use, and we will deliver the compatible format so you can load it without conversion problems.
Can you digitize 3D puff or appliqué designs for caps?
Yes. We offer 3D puff embroidery digitizing and appliqué digitizing, both of which work on caps. These styles need specialized file setups, so tell us which effect you want when you send your artwork.